Disable Microsoft compatibility telemetry on Windows 10: Recently when I was going through the task manager on my laptop, I discovered a service named Windows compatibility telemetry is running in the background.
Initially, I didn’t care much about that. But, when I saw the resources it was consuming, I decided to find a way to turn it off permanently so that I can use my laptop efficiently.
But when I searched for it on the internet, I saw that there is not so much information about it. So, I decided to help other people like me, who also want to get rid of this service.
Therefore, if you are looking for a guide that can explain to you how to disable Microsoft compatibility telemetry permanently, then you are on the right page. So without any further ado, let’s get started-
Must Read:
Contents
What is Microsoft compatibility telemetry?
Microsoft compatibility telemetry is a Windows service that holds all the information and technical data of the working and performance of different applications and software.

It is a part of Microsoft’s Windows Customer Experience Improvement Program. Periodically, it sends your OS’s technical and telemetry data to Microsoft so that they can enhance the user experience and services.
Therefore, it is not necessary to have this service installed on your device, and if you want, then you can also disable it. Also, the process to disable Microsoft compatibility telemetry is very simple. I have also shared these Rainmeter skins for Windows.
How to Disable Microsoft Compatibility Telemetry on Windows 10
Here, I am going to share four different methods that you can follow to disable this Microsoft compatibility telemetry-
Method-1: Disable Microsoft compatibility telemetry using Registry Editor
The very first method that can help you to disable this service is by using the registry editor.
To do that, you have to follow these steps-
Step-1:
First of all, go to the Start menu and search for the Registry Editor and open it.
Step-2:
Now, you have to navigate to the following path.
Computer\HKEY_LOCAL_MACHINE\SOFTWARE\Microsoft\Windows\CurrentVersion\Policies\DataCollection
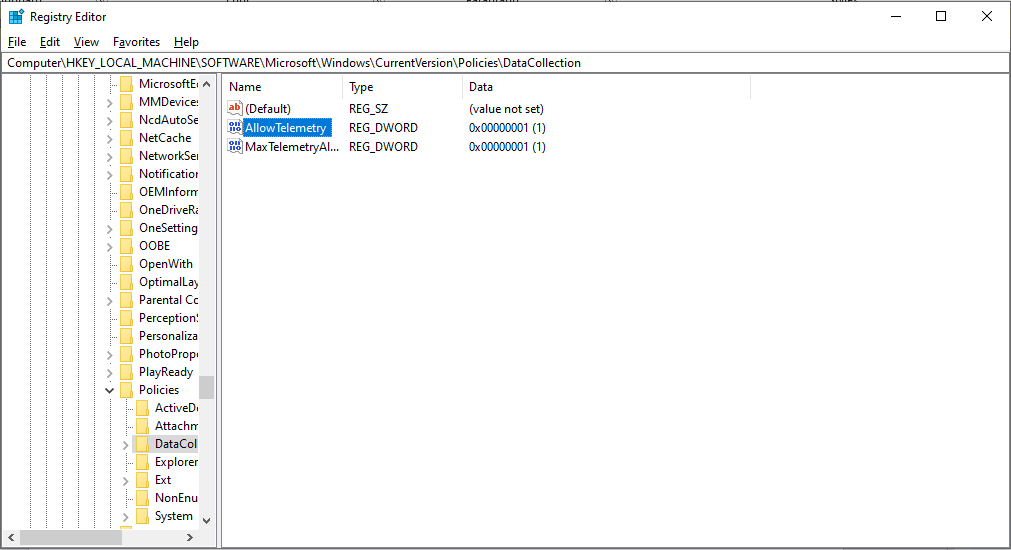
Step-3:
Here you have to double click on the AllowTelemetry option to open its settings.
Step-4:
In the Value Data option, you have to enter the key value to “0” and then you have to click on the “OK” button to save changes.
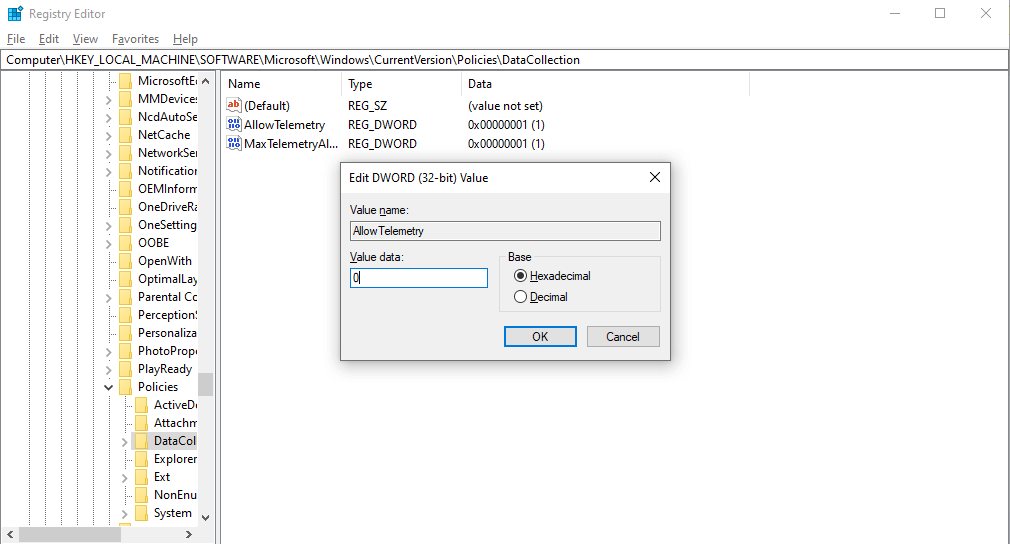
This method will help you to disable Microsoft compatibility telemetry from running in the background. Here you have to remember that the key-value “0” stands for the minimal security level, and setting it will prevent Windows telemetry from running in the background.
Whereas the value 1 stands for the basic level, 2 for the enhanced security level, and 3 for the full security level. However, for non-techy users, getting into the registry editor can be a bit risky.
Therefore, if you are not so familiar with Windows programs and registry editor, then I suggest you try any different method mentioned in this article. Recently, I have shared these best Garageband alternatives.
Method-2: Use Group Policy Editor to disable Microsoft compatibility telemetry in Windows 10
The next method that you can try to fix Microsoft compatibility telemetry from your Windows device is by editing group policy.
To do that, you need to follow these simple steps-
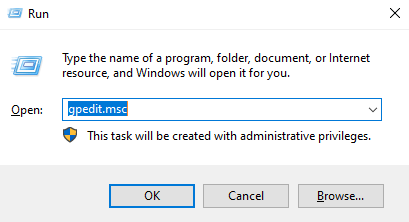
Step-1:
Open the start menu and search for Group Policy Editor and then open it. You can also use the Run Prompt to open it, and for that, you have to type MSC, and then, you have to hit the Enter button.
Step-2:
Now you have to navigate to the following path.
Computer Configuration\Administrative Templates\Windows Components\Data Collections and Preview Builds.
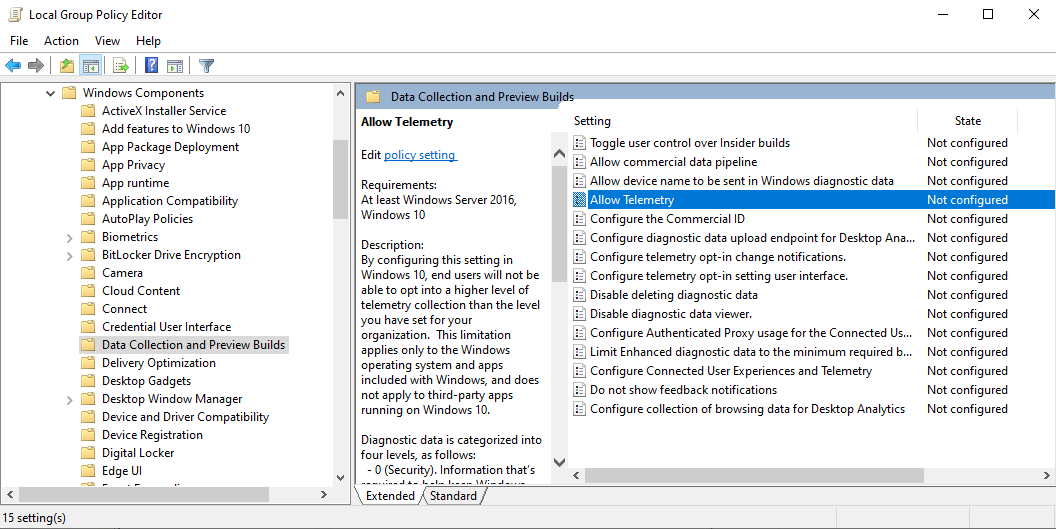
Step-3:
Now look for the Allow Telemetry option in the Settings tab and double click on it to open.
Step-4:
A pop-up box will appear, and here you have to disable it and then hit on the Apply button to make changes.
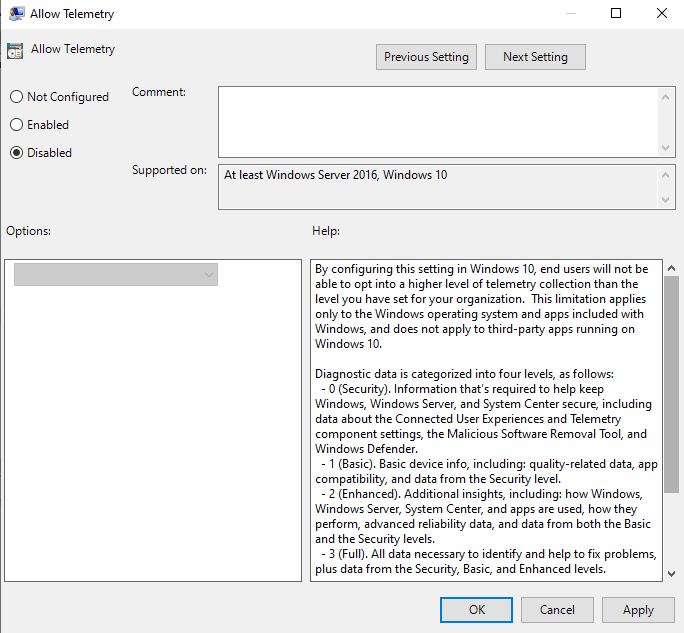
That’s it. This method is much easier and comparatively less risky than the previous method. However, there are two more ways to disable the Microsoft compatibility telemetry, and I have mentioned them below.
Method-3: Disable Windows compatibility telemetry using Task Scheduler
This method may look a bit complicated for non-techy Windows users. However, you can still give it a try.
To disable Microsoft compatibility telemetry using this method, you need to follow these simple steps-
Step-1:
First of all, you have to open the Task Scheduler. You can do that by going to the Start menu and then searching for the Task Scheduler.
Step-2:
Here, you have to navigate to the following path.
Task Scheduler Library\Microsoft\Windows\Application Experience
Step-3:
Here in this Application Experience folder, you have to look for the Microsoft Compatibility Appraiser and then right-click on it and disable it from the settings.
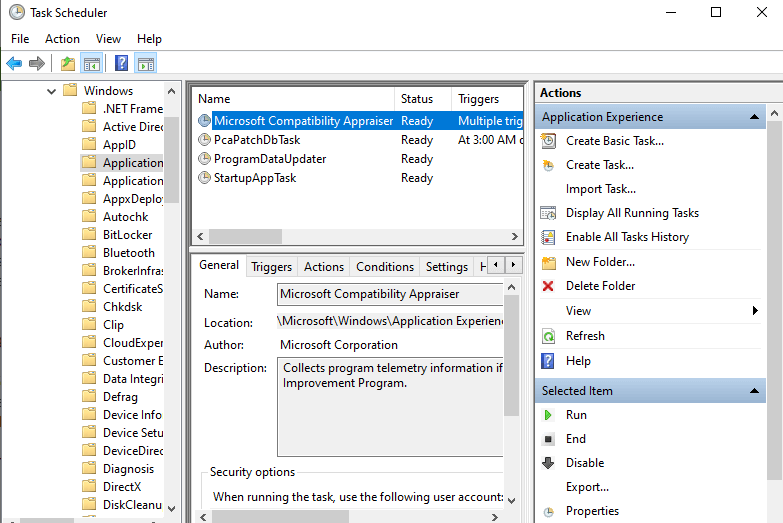
Once you are done with that, you can open Task Manager to check if the program is still there or not.
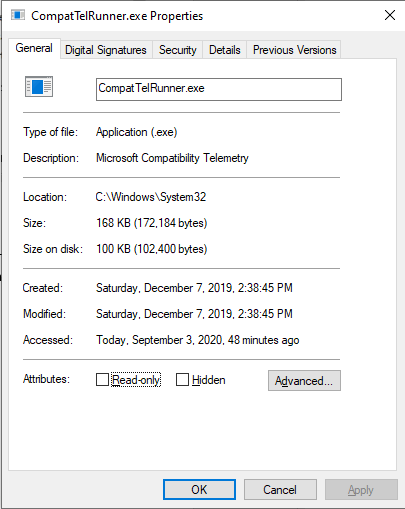
Method-4: Deleting CompatTelRunner.exe to disable Microsoft Telemetry service
Another simple method that you can follow to get rid of Microsoft compatibility telemetry service is by deleting the CompatTelRunner.exe file. CompatTelRunner.exe is the executable file that is very necessary to run these services.
To delete CompateTelRunner.exe file, you have to follow these simple steps-
Step-1:
First of all, go to the Windows installation drive and look for the System32 folder and open it.
Step-2:
After that, you have to find the CompatTelRunner.exe file and then right-click on it and select the Properties option.
Step-3:
Now, head to the Security tab and click on the Advanced button.
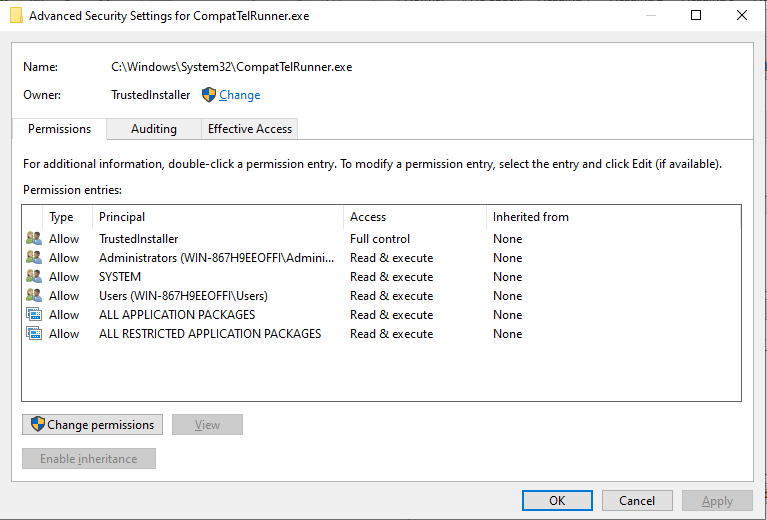
Step-4:
Here you have to click on the Change option available in the Owner section.
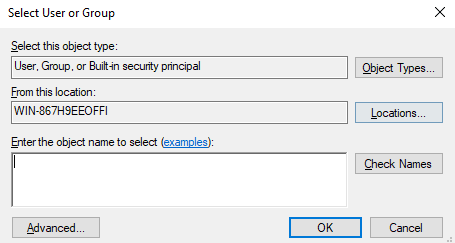
Step-5:
Here, you have to click on the Advanced button. It will open another window, and here you have to click on the Find Now button.
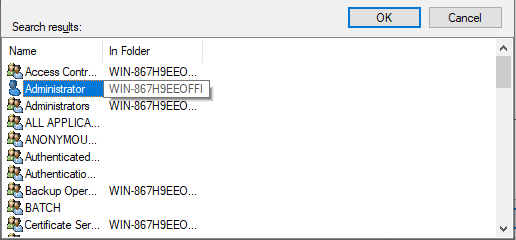
Step-6:
Here you will see a list of users. Find your account and click on the OK button to save changes.
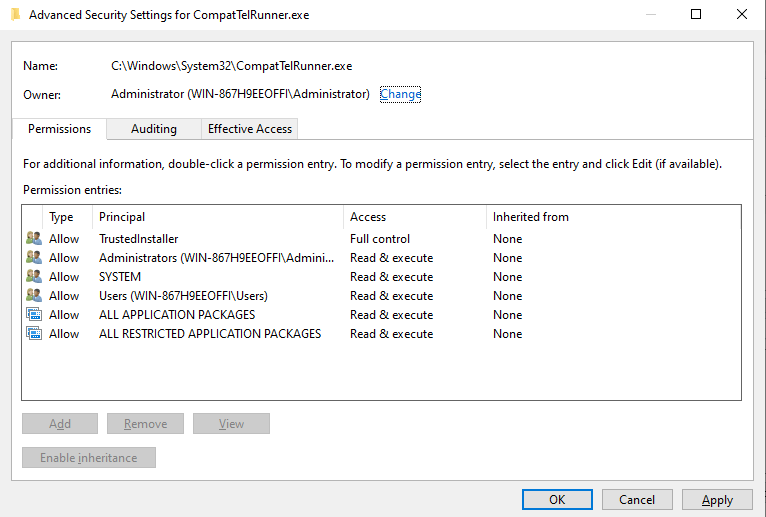
Step-7:
Here, you have to click on the apply button.
Step-8:
Now you have to right-click on the CompatTelRunner.exe file, and then you have to delete it.
That’s it, guys. It was the last method that I wanted to share with you to disable Microsoft compatibility telemetry from your Windows 10 PC.
Must Read:
Wrapping Up
There you have it – the best methods to disable Microsoft compatibility telemetry service. Although this service does not send any personal information to Microsoft, it consumes a hell of a lot of resources on your PC. Therefore, it becomes necessary to disable it somehow.
However, since it is a Windows OS-based service, disabling it becomes a bit difficult. That’s why some of the methods that I mentioned in this list may look a bit tough to achieve for you.
With that said, here I am wrapping up this article. I hope it helped you to learn how you can disable the Microsoft compatibility telemetry. Nevertheless, if you face any issues while following any of the guides mentioned above, feel free to shoot a comment in the comment section below. Our team will try to answer all your queries ASAP.